ingredient.
Can These Butterfinger Bites Be Made Into Anything Special?
The answer is obvious! Unleash your inner chef, go ahead and do it. The options are limitless; substitute any candy bar for Butterfingers or add seasonal sprinkles. These Butterfinger Balls are versatile and delicious, so you may use them to demonstrate your culinary prowess.
Give me some pointers on how to maintain these enticing balls.
Luckily, they are beautiful choices that need little care. When properly packed, they may be kept in the fridge for up to four weeks. To avoid sticking, separate the layers with wax or parchment paper. Want to put some aside for when you have more time? These peanut butter snack recipes may be prepared in advance and frozen for a period of up to six months.
Could These Butterfinger Balls Be Made Ahead of Time?
Sure thing! These desserts are perfect for making ahead of time. The balls may be made in advance and frozen. Tempered chocolate is the perfect finishing touch when it’s time to serve. You may either let them thaw out at room temperature or carefully defrost them in the fridge overnight.
Every ezoic
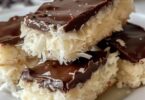
Making your own Butterfinger Balls couldn’t be easier, and all the necessary ingredients are right there. This no-bake snack is a step up from your standard peanut bar thanks to its gorgeous chocolate covering, crunchy peanuts, and creamy filling. Your taste buds will want you to give it a go, and you won’t be sorry.
The Ingredients for the Recipe
Butter, melted, four tablespoons quarter of a stick
vanilla essence, 1 teaspoon
Choco chips or bark, eight ounces
cup and a half of broken Butterfinger bars
Half a cup of sugar powder
Jar of peanut butter, measuring one cup avoid using organic products
3 and 3/4 cups of crushed graham crackers
Garnishes such as festive sprinkles, coarse sea salt, or extra crushed Butterfinger bars are entirely discretionary.
Instructions
Initiate the Dough: In a bowl, melt the butter and while whisking, add the peanut butter. Use a stand mixer or electric mixer set on medium speed to blend until the mixture is smooth and creamy.
Aromatherapy for Flavor: Add the vanilla essence and stir until combined.
Add the finishing touch by gradually blending in powdered sugar while on low speed. Scrape down the sides of the bowl to ensure that everything is blended evenly.
Get ready for crunch time by gently mixing the graham cracker crumbs and crushed Butterfinger bars.
Align Them: Roll out some parchment paper onto a large baking sheet. Round out the dough with a measuring spoon, form it into neat balls, and place them on a baking sheet.
Fourth, freeze the dough balls for at least 30 minutes, or until they are completely firm.
The chocolate symphony may begin after the dough balls have cooled. Get the melting pot going. Place in a microwave-safe bowl and cook for 30 seconds on 50% power, stirring every interval. If lumps do develop due to overheating, combine the ingredients well and they will dissolve.
Put the Final Touches On: After the balls have cooled, dip them in melted chocolate. You may either layer them entirely or leave a little peanut butter mixture visible.
Add extra crushed Butterfinger bars or holiday-themed sprinkles for garnish. A little flaky sea salt will give it that extra kick.
The icing on the cake, the Butterfinger Bliss Balls, are best enjoyed shortly after the chocolate has hardened.
A friendly reminder: these goodies, when packaged correctly, will keep in the fri
ADVERTISEMENT